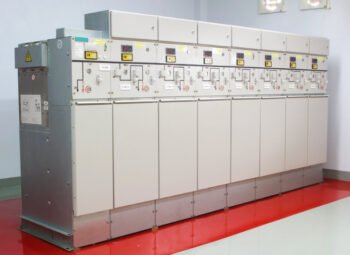
For the safety of the electrical system, it is essential to install the wiring for switchgear panels carefully. As far as safety, reliability, and performance are concerned. Proper wiring of the switchgear panel ensures proper power flow and connects components without causing overheating or a short circuit.
In industrial and commercial environments, a well-executed wiring system not only minimizes downtime but also helps prevent component damage. This ensures the long-term stability of the system and also its increased lifespan. The article helps you understand the practical steps for safely installing the switchgear panel wiring.
Types of Wiring Used in Switchgear Panels
A switchgear panel installation uses various types of wiring based on its functions, voltage, and current levels, and system requirements. The type of wiring is made with specific materials, insulation, and construction standards to ensure safe and efficient operation. The correct selection of wiring helps improve performance and prevent overheating, signal interface issues, and faults. In modern, smart panels, wiring is categorized to handle power distribution and communication between components.
Material and Technical Details of Wiring
| Parameters | Power Wiring | Control Wiring | Communication Wiring |
| Description | The power wiring handles the main electrical current for the load distribution within the switchgear panel. | The control wiring connects the relays, circuit breakers, and control devices to transmit signals. | The communication wiring supports data transfer in automatic systems, i.e., PLCs and SCADA systems. |
| Material and Insulation | The material of power wiring is copper or aluminum conductors with PVC, XLPE, or EPR insulation. | The control wiring material is fine-stranded copper wire with PVC or flame-retardant insulation. | The communication wiring consists of copper conductors in shielded twisted-pair cables. |
| Key Features | They are designed for high current capacity. Proper wiring sizing prevents overheating and voltage drop. | The control wiring operates at low voltages ranging from 24V to 230V. These wires are flexible and used for noise shielding. | The wiring minimizes signal interference and ensures reliable communication in a noisy environment. |
Tools and Materials Required for Panel Wiring
The efficient and safe operation of switchgear depends on the use of appropriate tools and high-quality materials. These tools and materials help make precise connections and enhance durability. Also, it helps to reduce the chances of overheating in the system. For essential switchgear panel accessories and their functions, you can see this article.
| Tool/Material | Purpose |
| Insulated Wires | It provides a safe current flow. |
| Cable Lugs | It ensures strong Terminations. |
| Wire Stripper | It removes insulation accurately |
| Multimeter | It tests the voltage and continuity of current flow. |
| Crimping Tool | It secures the terminals firmly. |
Step-by-Step Guide for Switchgear Panel Installation
Switchgear panel maintenance and installation are all about knowing where to place the components and thoroughly reading the diagram. Once you understand the designs and diagrams, it becomes easier to know where the wiring should be connected.
Review Drawing and Specifications
The first step is crucial, as the entire process is based on it. Understanding the drawing is essential; if you don’t grasp this point, there’s a chance of a mishap, so make sure you understand it well.
The first step is to start with the Single-Line Diagram (SLD). This step helps to understand how the panel receives power, passes it through the circuit breakers, and distributes it to various loads. After this step, move towards the detailed wiring diagrams. These diagrams help to show the terminal-to-terminal connection. Here are some points that need attention while reading the diagrams:
- Study supply details such as current, voltage, phase, and source thoroughly
- Study ratings and protections schemes
- Control logic, such as monitors and automation
The technicians and engineers keep the diagrams and drawings with them; this helps them follow instructions without mistakes.
Prepare Tools, Materials, and Workspace
The steep is essential, as it helps to understand the availability of tools and materials. Before starting the installation, it is important to look into these important steps:
- Check the availability of all tools and make sure they are in working conditions
- Arrange the cables, lugs, ferrules, and glands
- Make sure the panel is clean and in good condition; cleaning is important, as dust or moisture can cause issues later.
It is important to plan the wiring route. Plan each step, then execute, as good preparation reduces the chances of mistakes.
Isolate Power and Confirm Safety
This step is essential, and the experienced technicians should follow it.
- Turn off all the power sources
- .Apply the lockout/tagout label just in case, so no one accidentally switches on the power
- Use the multimeter or tester to check zero voltage
These specs help to understand that all sources of power are off. And don’t rely on someone to confirm for yourself.
Cable Selection and Preparation
The panel’s performance depends on the proper selection of the cable. So a poor termination can create resistance, which ultimately leads to overheating and damage.
- Select the cable size correctly based on the distance and current load
- The insulation should be stripped carefully
- Use the right size of the lugs and crimp them properly
Installation and Align Components
Before wiring, make sure all components are properly placed and installed.
- Install the circuit breakers, contactors, and relays as per the layout
- Fix the terminal blocks in an accessible position
- Install the busbars with proper insulation
Power Wiring
The main circuit installation is also a crucial component, as the entire system’s operation depends on it. The actual load is handled in it.
- Connect the power supply to the main circuit breaker
- From the breaker to the busbars, connect them all
- Connect busbars and outgoing feeders.
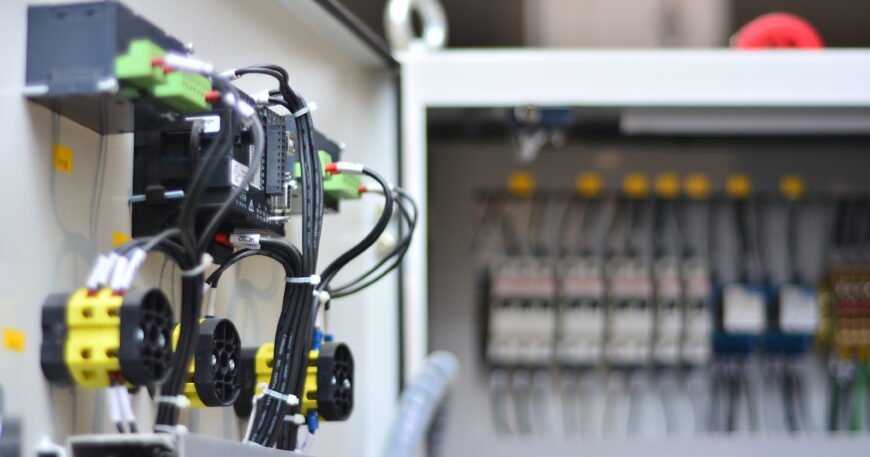
Control Wiring
The next step is the control wiring, which is a detailed work and should be done with attention.
- Connect the push buttons, selector switches, and indicators
- Wire relays, contactors, and PLC I/O points should be connected properly
- Use the ferrules and the numbering on both ends of the wires for identification
Earthing and Bonding
Earthing should not be ignored for safety reasons. Without proper earthing, even a fault can be life-threatening.
- Connect the panel body, and then connect it to the earth bar
- Ensure all the metallic parts are properly bonded
- Check for the continuity of the current using the tester and multimeter
Inspection and Testing
Before making the system functional, it is important to inspect and test every step to avoid errors properly. Never skip the testing part just by looking at the wiring.
- Inspect all the connections.
- Perform the continuity test by checking the wiring paths
- Use the meggertoo test insulation resistance
- Check the operations of the breaker and relays
Each step is connected to the others; skipping any steps can cause a major effect on the safety and performance of the entire switchgear panel. There is a difference between average and professional work, so always seek professional help. Neat wiring, proper labeling, correct torque, and thorough testing are essential steps to prevent faults, overheating, and unexpected breakdowns.
Conclusion
In simple terms, switchgear panel wiring is a difficult job, and it should not be done in a hurry. Understanding the diagram and the designs is a crucial step, as it helps determine where the components are to be placed or which wiring is to be used. Clean wiring, tight connections, proper labeling, and careful testing make a huge difference in performance and reliability. At the end, the installation should be completed with focus and attention to save time and ensure long-term reliability.